swiper 前へ次へを画像に変える+ページ総数と現在の枚数を表示させてみる

ひさしぶりの更新ですー!
生活が変わり以前のように写真を撮りに行かず・・
刺繍したり絵を描いたり字を書いたり、そんな毎日です。
折角なので、つくったものを載せるサイトをつくりました。
写真やイラストがメインで、テキスト少なめのレイアウトです。
スライダーに、ページネーションっぽい感じで
スライド画像のカレントと総数を表示させてみました。
トップページに実装しているよ
(PCサイズのみ表示しています。ぜひPCで見てくださいね〜)

スライダーはswiperです。
swiperはオプションがたくさんあって便利◎
今回は番号表記の「fraction」を使って、少しカスタマイズしてます。
ページ総数と現在何枚目か表示させる
ページネーションのように、カレント(現在表示されているスライド●枚目) / スライド総数を表示させたかったので、fractionを足します。
js
const swiper = new Swiper(".swiper", {
  pagination: {
    el: ".swiper-pagination",
    type: "fraction",
  }
});
「.swiper-pagenation」というクラスのtypeを「fraction」に。
HTML
<div class="swiper">
  <div class="swiper-wrapper">
    <div class="swiper-slide">Slide 1</div>
    <div class="swiper-slide">Slide 2</div>
    <div class="swiper-slide">Slide 3</div>
    <div class="swiper-slide">Slide 4</div>
    <div class="swiper-slide">Slide 5</div>
  </div>
  <div class="swiper-pagination"></div>
</div>
htmlはこんな感じかな。
swiper-pagination を記述したところに実際に吐き出されるhtmlは
<span class="swiper-pagination-current">1</span> / <span class="swiper-pagination-total">5</span>こんな具合で、spanで囲われた数字の間に「/」が入ったもの。
装飾したいときはそれぞれのclassに対してCSSを記述していきます。
CSS
/* ページネーション */
.swiper-pagination {
  color: /* 文字色 */;
}

/* カレント */
.swiper-pagination-current {
}

/* スライドの総数 */
.swiper-pagination-total {
}
元々の記述を非表示にしつつ装飾を足します。
勝手に出てくる「/」がいやだ
「/」が味気ないので画像にしました。
js
pagination: {
	el: '.swiper-pagination',
	type: 'fraction',
	renderFraction: function (currentClass, totalClass) {
		return '<span class="' + currentClass + '"></span>' + 'ここに画像やspanなどhtmlを' + '<span class="' + totalClass + '"></span>';
	}
},
imgやspanなどを代わりに出したいときは、renderFractionのパラメータに吐き出したいhtmlを書き足すと出力されます。
ページ番号をすべて横並びで表示したいときは、fractionではなくbulletsをつかいます。
前へ次へ、の青い矢印を別のものに変えたい
今回はページネーションを挟んで両サイドに前へと次への矢印を出したかった。
HTMLはこんな感じに記述していました。
<div class="swiper-button-prev"></div>
<div class="swiper-pagination"></div>
<div class="swiper-button-next"></div>
js
navigation: {
	nextEl: '.swiper-button-next',
	prevEl: '.swiper-button-prev',
},
navigetionのprevとnextの指定をすると前へと次へが出てきます。
前へと次へ、デフォルトで出てくるのは青色の<>です。
この<>が背景で指定されていますので
元々の背景を消す+変えたいところを記述する感じです。
.swiper-button-prev,
.swiper-button-next {
  height: ;/* サイズ調整 */
  width: ;/* サイズ調整 */
  color: transparent;/* 画像にしたいときに文字色を透明にする */
}
.swiper-button-prev::after,
.swiper-button-next::after {
  content: "";
  height: ;/* 背景画像にする場合は必ず指定 */
  width: ;/* 背景画像にする場合は必ず指定 */
}
.swiper-button-prev::after {
  background-image: url(画像のパス) no-repeat / contain;
}
.swiper-button-next::after {
  background-image: url(画像のパス) no-repeat / contain;
}
.swiper-slide img {
  width: 100%;
  height: auto;
}
swiperのカスタムをしたきっかけは、サーバの整理。
いらないものを置きっぱなしにしないように、定期的にお掃除しています。
使ってない画像を削除しておりましたところ
なんと使ってる画像まで消してしまいました・・
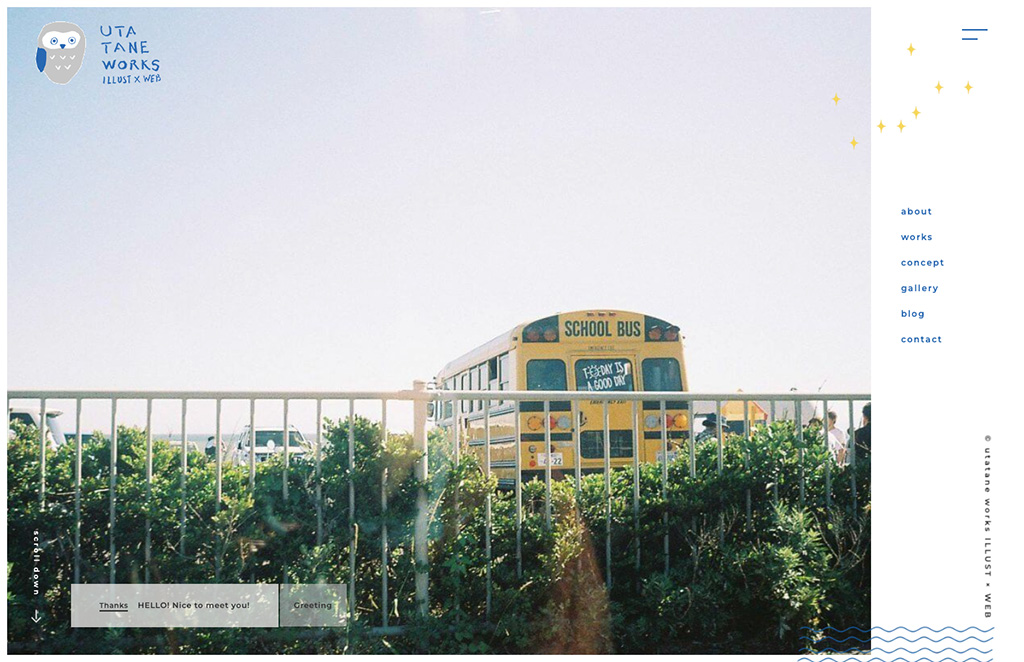
この、右下の

確認せずに捨ててしまった・・
仕事では絶対全部バックアップ取るのに気が抜けるとこうだ・・
できた余白の部分に、いつかつけたいなーと思っていたページネーションを実装しました。
結果、わかりやすくなったからよかったよね。
swiperはいろいろカスタムできるので、みなさまもぜひ〜
